Capturing the Barrenlands: A Pro’s Guide to Arctic Wildlife Photography –
There’s nothing like getting a shot that you love, the special one that can tell the story of your experience in the wild and brings you back to “that moment.” This article offers expert insights – technical tips and essentials for being in the field to increase your chances of getting the shot you’re dreaming of.
Expert Insight: 40 Years of Photography
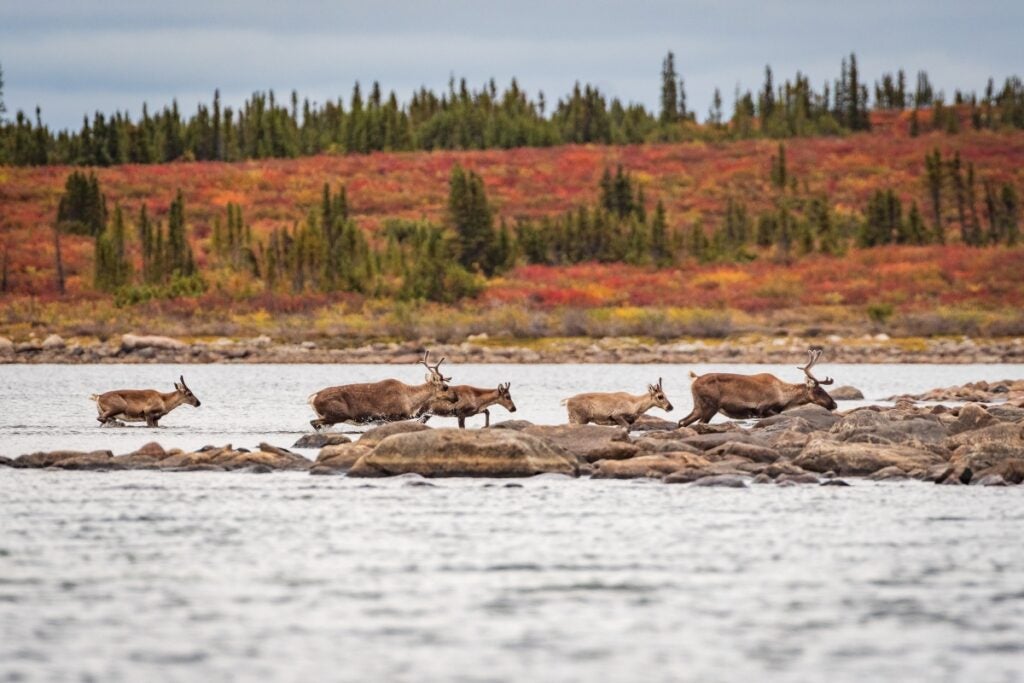
My passion for photography has taken me to the most remote parts of the world, from Antarctica to the Beaufort Sea and dozens of other scenic locations in between. I have taken seven plus trips to the remote Barren Lands of the Northwest Territories to capture the caribou migration, stunning colors of the tundra in autumn and otherworldly dancing northern lights. With 40 plus years of photography experience and having mentored with several Professional Wildlife Photographers I have upgraded camera equipment more times than I would like to admit. I have also learned some valuable and practical lessons about photographing wildlife in their natural habitat and capturing images of the natural world.
I would like to share a few of those lessons with you to help you prepare for your trip to Petersons Point Lake Lodge, to attend their annual Arctic Photography Workshops where you will find a variety of Arctic wildlife along with unique and beautiful landscapes all under light-pollution free Dark Skies – perfect for capturing the frequent Aurora shows.
Preparation: Gearing up for the Barrens
Dress for success: I recommend choosing natural colors, keeping in mind the foliage of the area you will be in and the time of year. Generally avoiding neon and bright solid colors that are not found in nature.
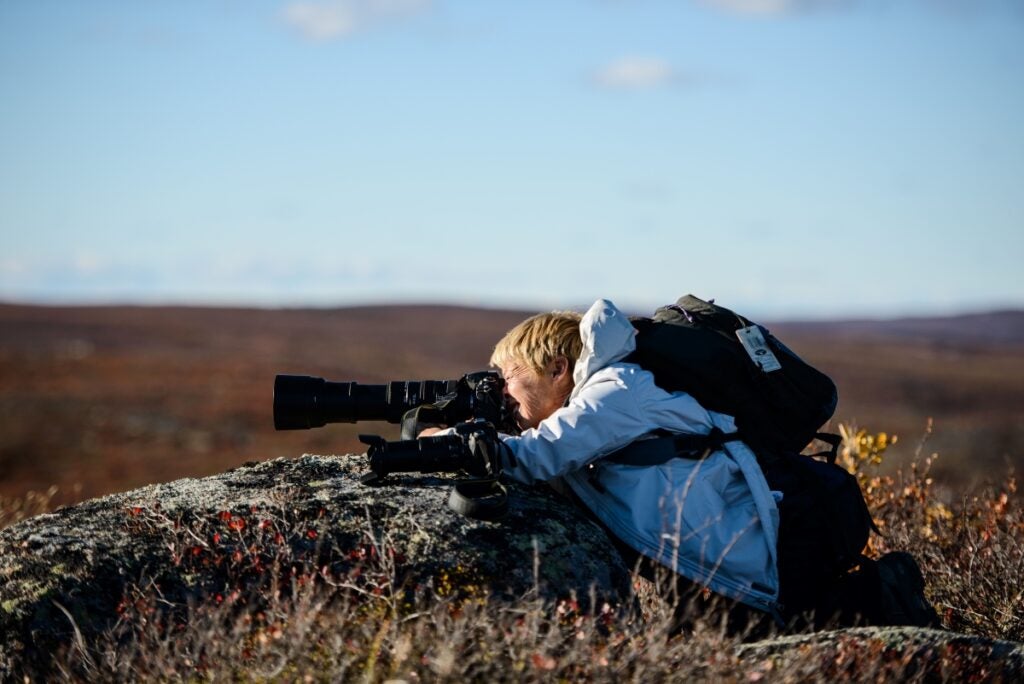
Carry only what you need, so you can move freely, quickly and quietly. You probably don’t need to take every bit of camera gear you own. Pair your gear with the type of excursion you’re going on that day and set up your camera in advance. I like to take a small backpack, for a spare lens or two, batteries, cards , extra layers of clothes, water, snack and any “other stuff”
I set up a camera body with long lens and carry it, so I’m ready for anything. I use one hand for my camera and keep the other one free in case I need to move branches or for balance scrambling over uneven ground.
Before heading out I ensure that there are no clips jingling or straps with buckles flapping. Learning how to be quiet while moving with your camera equipment, is critical for a wildlife photographer. Most times whatever you are trying to sneak up on is already aware of you. If you can, practice moving through brush and/or long grass without making too much noise. Decide if need to carry your tripod with you. Depending on your lens and physical ability, you will need to make a personal decision about that. Before you decide, try hiking without the tripod, try using a monopod or sitting with your elbows on your knees to stabilize your longest lens. Or laying down and using your backpack as a beanbag. Find out what works for you. If your longest lens is one that requires a tripod, chose a lightweight carbon fibre or similar, and practice hiking with it attached to your pack, or over your shoulder with body & lens attached.
Technical Stuff – Essential Camera Settings for Wildlife
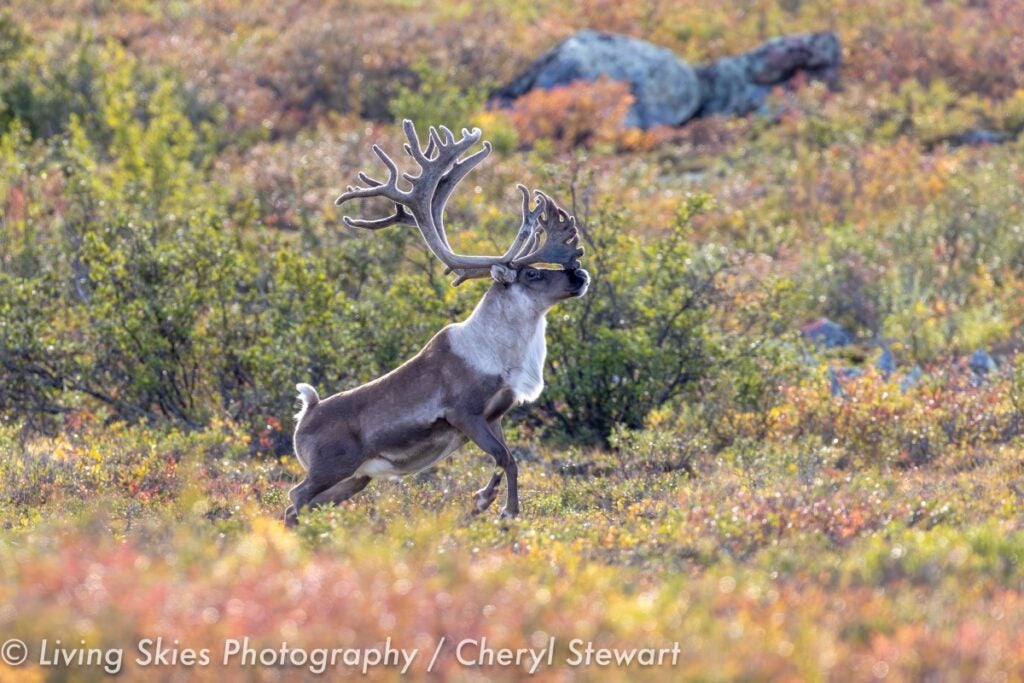
For wildlife photography tips for beginners, there are some basic staring points: Wildlife photography is most commonly done with a long lens. Start by following the common rule of setting your shutter speed to double your lens length. For example, if I’m set up with a 500mm lens to photograph a caribou, the shutter speed will be set at least 1/1000 sec. From there, settings will be adjusted based on lighting and subject… Taking into account, if the subject is moving, or if you are moving. The priority is getting a sharp image, and that starts with shutter speed, move to faster speed as needed, adjusting ISO and f-stop as you go. Always preset your camera to the settings you anticipate using and be ready to be able to change your settings to adjust on the situation you find yourself in.
Shutter Speed: common guidelines (after factoring in lens length for your shutter speed)
- Slow Running animals minimum 1/1250 sec
- Flying / moving Birds 1/2500 sec
- Fast moving animals and small flying birds: 1/3200 sec
- Focal Point Set to Spot Focus, to keep eyes in focus.
- Aperture somewhere from 5.6 to 8, or up to 11 of you need more depth of field
If I’m on a trip of my own, or if I’m leading Peterson’s Point Lake Lodge Arctic Photography Workshops whenever I’m working with local guides I refer to their expertise, watching how they move and following their instructions in the field.
I’m also an avid reader and often read about my subject (s) habits and habitats. I try to understand their behaviors and how to watch for indicators so I know their level of comfort, whether they may be nervous or stressed. I try to keep any disturbance to a minimum and I’m a believer in leaving only footprints.
The Art of the Approach – The Stalk, Respect and Ethics
The difference between a missed opportunity and that photo you dreamed of is being ready, so be sure to have your camera in hand – you won’t have time to start digging through a backpack or changing lenses. Use the terrain, whether that be a rock, tree or foliage as a natural blind, keep low and to the ground as much as possible, approach the subject slowly, indirectly, moving side to side, and pausing frequently. It’s recommended to avoid eye contact, using quick glances to monitor the animal’s behavior and watch for signs of nervousness or stress. Avoid any loud noises, or jerky actions. Shoot a few frames each time you stop. This will allow you to adjust your settings, get the subject used to your camera noises and your movements. When you are getting close enough, Settle into your spot, find support for your lens, and relax. Shoot some quick frames, and then stay still, allow the animal to adjust to your presence and return to its normal behavior. If your subject moves away, or is aware of you, stay still and quiet, wait for an opportunity to move based on the animals behaviour. You will at the very least have the opportunity to get some shots from a distance, framed to include the natural environment.
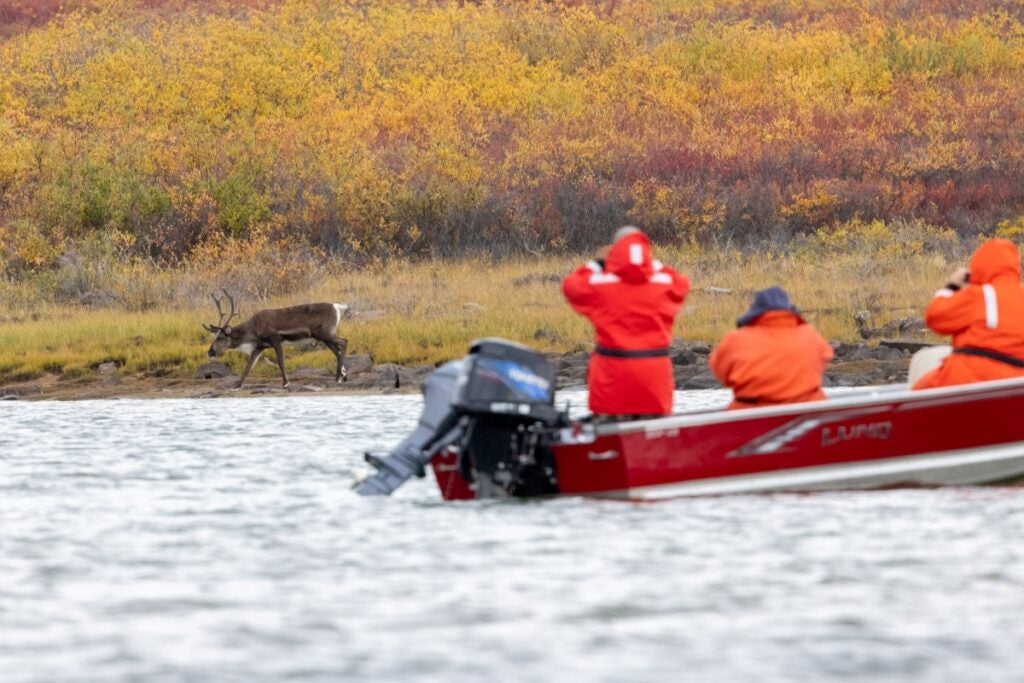
Field Etiquette: Group Dynamics and Professional Courtesy when shooting with a group.
In a group setting, all same the rules of apply. Photographers need to have spatial awareness – in the excitement of a sighting, shifting just a few inches can put you in your neighbour’s shot, so take a quick glance around to ensure you aren’t’ obstructing someone else’s line of sight before adjusting your position. Moving and staying quiet is essential – communication by subtle hand signals can be effective. If you’ve got the shots you want, remain still and quiet or perhaps you can move back and give someone else the opportunity to move into a better position. Respecting the other members of the group is a common courtesy, and will be appreciated by everyone, the goal at Peterson’s Point Lake, Arctic Photography workshop is to assist all participants to get the very best opportunities to capture the shots they desire.
Mastering Lighting, Composition and Perspective
Try to keep the light behind you, or off to a side so that the subjects’ head/face is illuminated. If possible, maneuver to get into a good position with the light in mind, try to catch the light in the eyes, and be aware of contrast and adjust your exposure accordingly.
When composing your shots, Take the time to look around, be aware of the background. Look for distracting elements like stray bushes, branches or tall grass that may show up in your image. If you need to make slight positioning adjustments, do it with the same slow movements as in the approach. Focus on the eyes using “spot focus” and move the focal point around in your frame to get it where you want it. Check your exposure frequently & adjust settings as required. Remember to shoot both vertical and horizontal images! Don’t settle for just one look, change up your shots if you can, shoot several compositions instead of the same one over & over.
Try shooting from the animal’s eye level, which can create a different and personal interactive feeling. Be sure to watch for “catch lights” that tiny reflection in the eyes that makes a subject come alive. As your subject moves, changing head position can offer the opportunity to capture this spark. You may prefer to shoot in short bursts because often the eyes and ears or wings are constantly moving. You’ll ended up some bloopers, half-closed eyes, crooked ears, mouths open etc…but bursts can also help get that hard to capture shot.

Patience in the Wild
Be patient – weather is always a factor, sometimes waiting for the sunshine to break though the cloud can make a huge difference, transforming a flat scene into one with definition or dramatic quality.
While close up and head shots are popular, try including elements of surrounding habitat, wildlife behavior and interactions in some of your shots. Stay ready, the most interesting shots often come from a behavior change in your subject.
It’s a lot to try to incorporate and comes together with practice. Most of all, take a minute or two to lower your camera to simply watch and appreciate that you are right there at that moment.
“I took a walk in the woods and came out taller than the trees” ~Henry David Thoreau
I look forward to meeting you on the tundra … Cheryl Stewart, Living Skies Photography