Northern Lights Photography – Expert Tips on Where, When and How to Capture the Northern Lights.
If you’ve never seen the Aurora Borealis, it’s an experience you’ll never forget. Every northern lights display is unique and totally unpredictable. The aurora can dance and pulse across the sky, slowing appearing, then disappearing, suddenly spiking and spiraling overhead, or rolling across the horizon. It transforms into mesmerizing shapes and forms – bands, rays, ribbons, loops and curtains while showcasing a potential palette of colours, including, green, violet, pinks and reds.
Witnessing the aurora can evoke feelings of awe, wonder, and connection to something greater than oneself – reminding them of their place within the vastness of the universe.
If you want to capture these magical moments on camera you will need the right tools. Today’s professional cameras and smartphones have the ability to pick up more colors and detail than the naked eye and can enhance your viewing experience substantially. If you are interested in photographing the aurora, here are a few tips to get you started.
Aurora Photography – Top 10 Tips
Location: To view nature’s light show, you need to be in a location, where the aurora is frequently visible – under the auroral oval, such as at Peterson’s Point Lake Lodge, where the world’s best display occurs. Choosing the right environment is crucial. A Dark Sky Location is essential, far away from city lights and skyglow as this minimizes light pollution. This dark environment not only allows you the opportunity to see the aurora with the naked eye, but it provides the best conditions for capturing it with a camera.
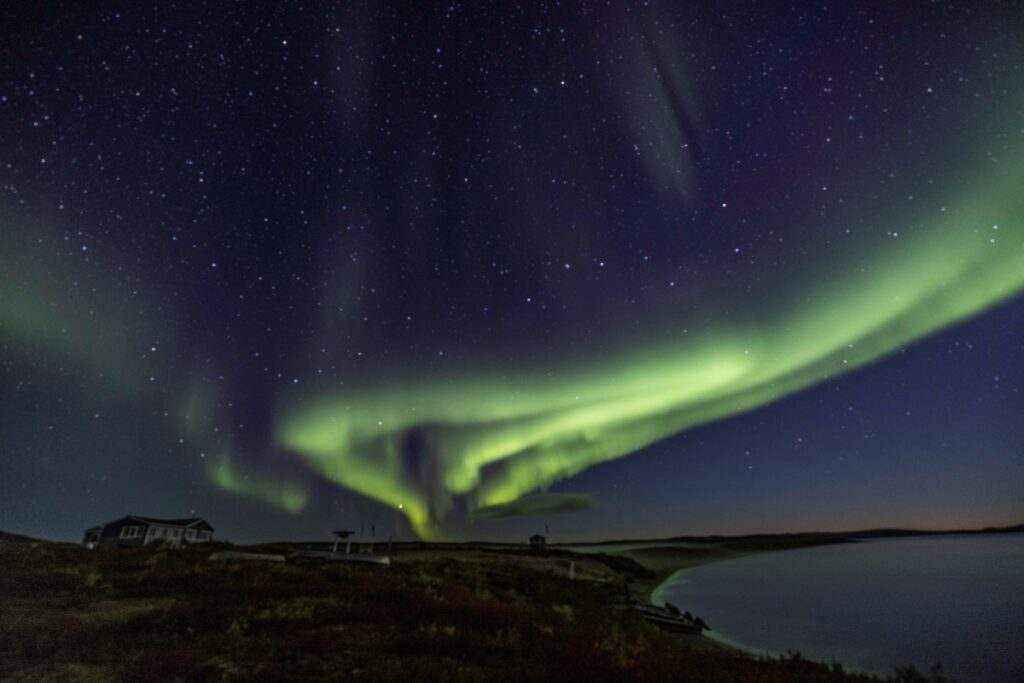
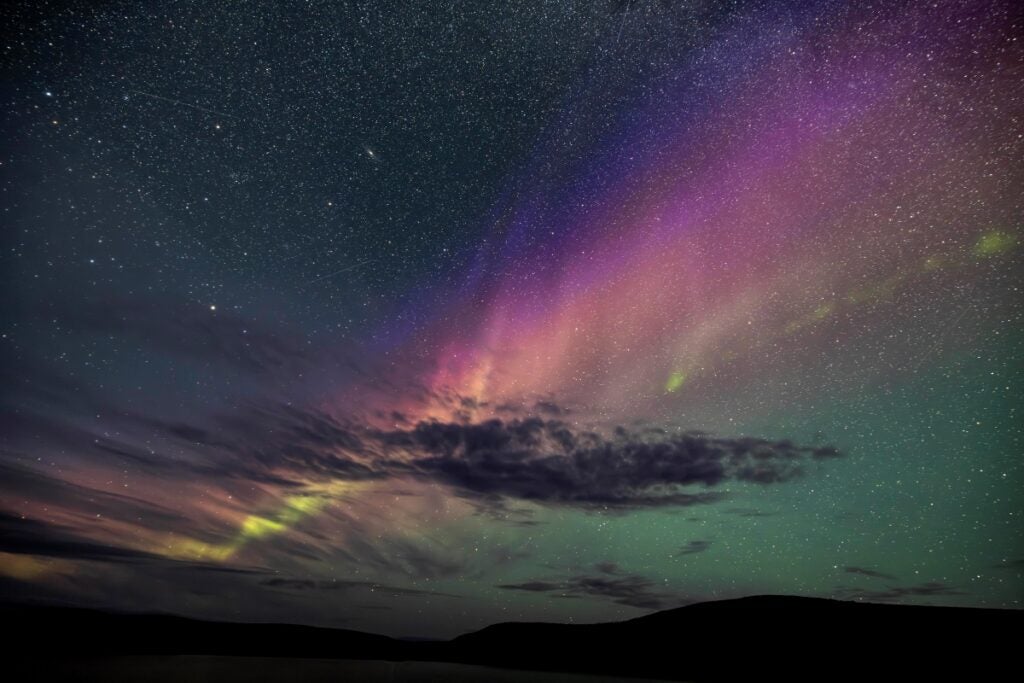
Camera Settings: F/2.8, 15MM, 2000 ISO, 10 SEC – Results: more detail in foreground.
A good rule of thumb is that if you can clearly see the stars, then you’ll have a good chance of seeing the aurora if it appears. A clear, cloudless sky and a moonless night will provide ideal viewing conditions. There are several aurora viewing apps to check probabilities and predictions to maximize your chances of seeing the northern lights but keep in mind that nature’s light show is unpredictable. Patience is key – you may need several nights of trying before you succeed.
For first time viewers you will quickly learn what northern lights look like. Often when the aurora first appears it may not be obvious, people may see a grey cloud or a soft green glow, this is a great time to take some test shots with your camera to confirm you’re looking at the northern lights. As the aurora display gets brighter and/or starts to move you will find it easier to identify in the dark sky.
Tripod: As with any night photography, you will be taking long exposures – too long to be able to hand hold your camera, so a sturdy stable tripod is a must. Ideally you want to have a tripod that extends enough that your viewfinder is at eye height to save yourself from having to crouch down to point the camera upwards. I also recommend:
- Practicing attaching your camera to the tripod and being familiar with moving the camera position, switching from horizontal to vertical and so on.
- Learn all of your tripod feature and be able to use them in the dark
- Consider using a remote release or a 2 second timer delay can help with camera shake
- Attaching a reflective tape, glow stick or ribbon can help you locate your equipment in the dark
Camera and Lens: A camera with Manual Mode, and a fast wide-angle lens is required to get the most of your photography experience. Regardless, if you have a Mirrorless, a DSLR, or a bridge camera you must be able to use it manually. Some point and shoots, and some phone cameras have the option to shoot on Manual. This simply means that you have the ability to set the f-stop, shutter speed, ISO and focus to what you want – and the camera will not override your settings.
You will benefit from a wide angle lens in the range of 10-24mm with an aperture of f/1.8 or f/2.8. However, you can still capture the northern lights with a lens that has an aperture of f/4, keeping in mind that you just won’t have the ability to take the same type of shots with a wider faster lens. Please note you cannot use Time Value, any automatic or semi-automatic setting when shooting in the dark as the camera’s auto adjustment will not understand the night sky and work against what your efforts to capture the aurora. You must be able to set your camera to manual mode.
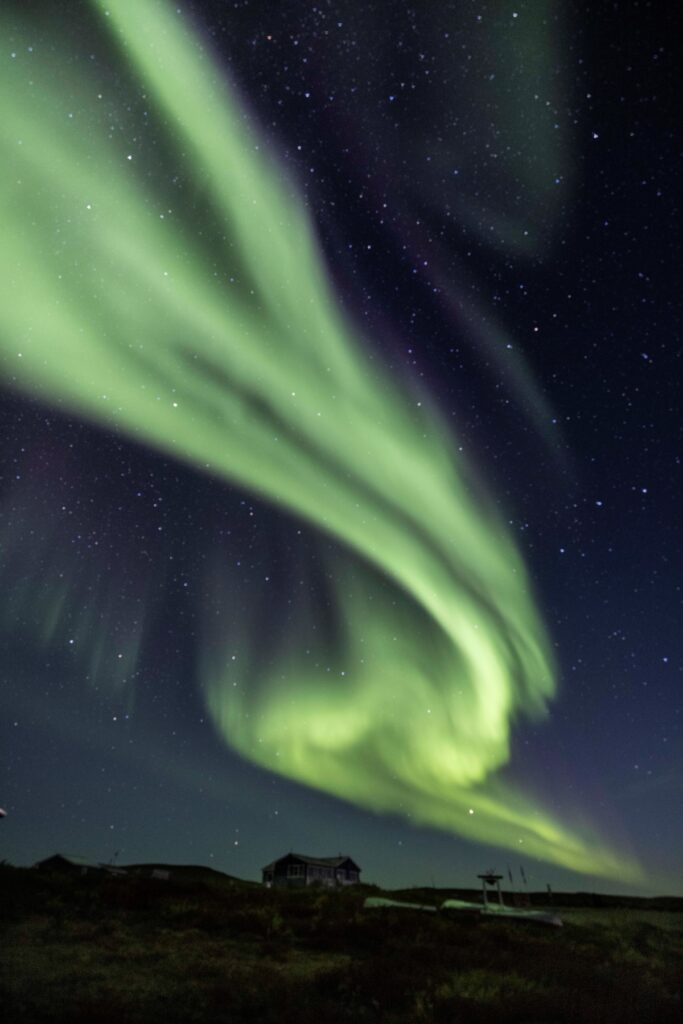
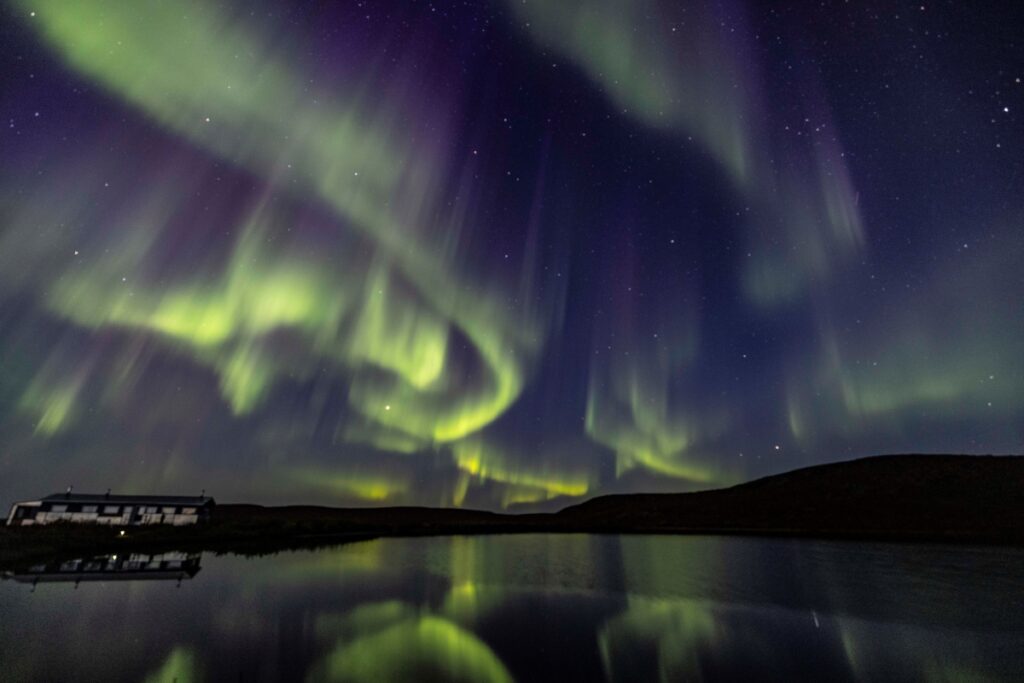
Camera Settings: f/2.8, 15mm, 2000 ISO, 10 SEC, Results: SOFT LINES
Focus your lens to infinity. This is absolutely the most difficult part of night photography and can be the most frustrating. Be patient with yourself. Some lenses have an infinity setting on the focus ring, be aware it is not always exact. The easiest way to focus on infinity is to do it before it gets dark. Here’s how:
- Set up the tripod with camera and lens at the widest aperture and use your auto focus to focus on something very far away, like the horizon or a faraway tree.
- Once you have it in focus, turn your lens from Auto Focus to Manual focus, and don’t touch it! This is not always easy. I use electrician’s tape to tape the focal ring in place. You can check where the infinity mark on your focus ring is, and how close you are lined up. If you are willing, use a marker and put a line on the lens where the rings line up.
If you forget to focus before it gets dark, or if you have bumped your lens, you will need to focus manually in the dark. Here’s How:
- Turn your ISO up very high, point your camera at a bright object, the moon, a faraway streetlight or tower, a bright star or planet.
- Adjust your focus until you feel it is as sharp as possible. Take a test shot, and check it, zoom in on the photo to see if the stars are sharp. If the stars are blurry, adjust and try again. It may take a few tries, but you should be able to focus so the stars appear as white pinpoints. After a few tries, you will be able to recognize when you are in or out of focus easily.
- Remember to change your ISO back and be careful not to bump your lens.
- Review your images regularly, and magnify them, so you can check the stars to see if you’re still in focus. Watch for camera shake, or tripod slipping.
Below are some examples of the same shot with different camera settings and visual results.
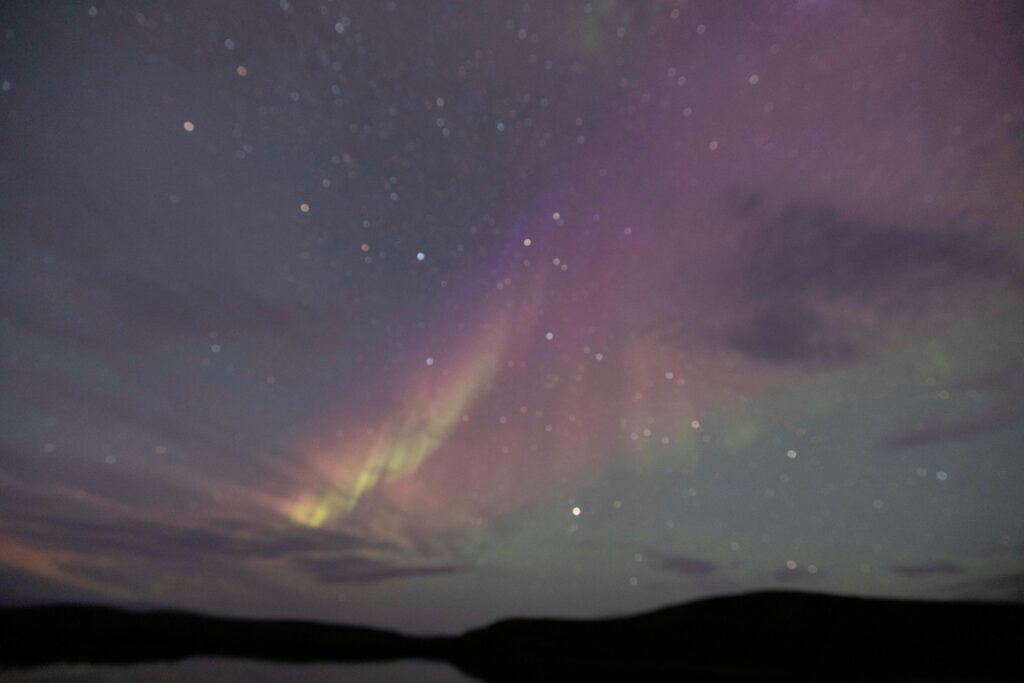
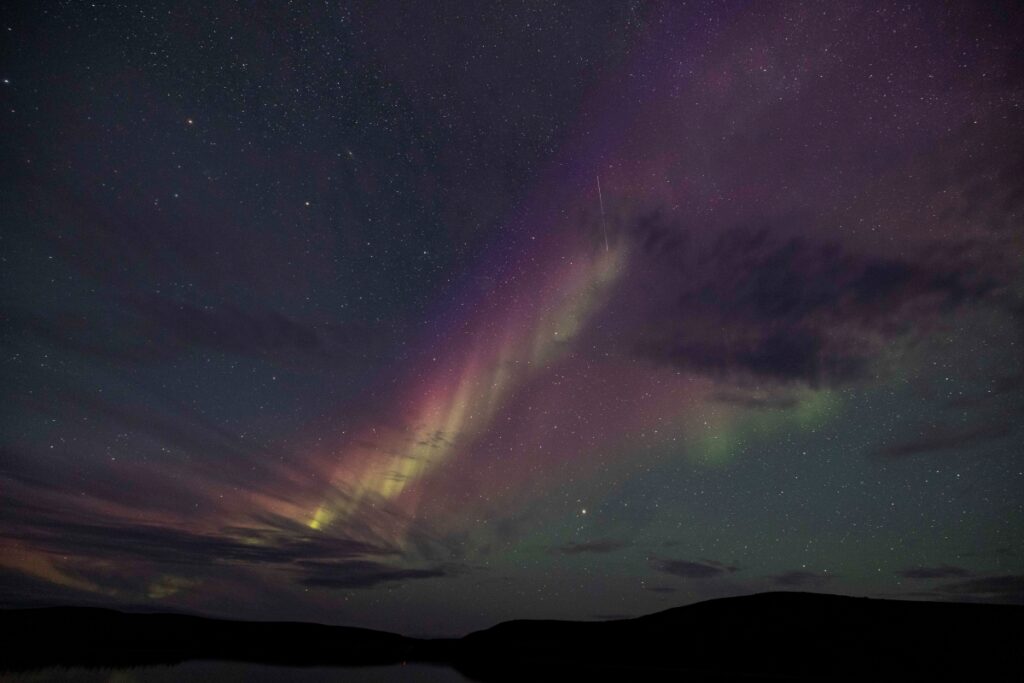
Exposure Settings: Manual means you are in control of all the camera settings. These settings may need to be adjusted throughout the night to match the changing aurora display as the northern lights can vary in brightness, movement and intensity – they might develop into bright or soft displays sweep across the sky, or jump and dance in vertical lines, often referred to as pillars.
There is no perfect exposure setting for capturing the aurora as conditions constantly change. However, the one setting you should keep constant is the aperture (f-stop). You should always have it set to the largest opening your lens allows, whether that’s f/1.4, f/2.8 or f/4 to let in as much light as possible.
A good place to start is using an ISO of 1600, and a shutter speed of 10 seconds. Do not be scared to experiment and use lots of different settings. I use auto white balance.
Change the shutter speed (5 – 25 seconds), and the ISO depending on how bright the northern lights are and how fast they are moving. Take a few test shots and increase your ISO or shutter speed as you think works best given the situation. For example, if the northern lights are extremely active and they are moving in the sky, you might increase your ISO all the way to 4000 and drop the shutter speed to 1 or 2 seconds to try and get the “edges” of the pillars more defined. If the aurora also happens to be really bright, you can use an ISO of 800 and shutter speed of 3 or 4 seconds to get the same results. It’s a time to experiment and take lots of photos and it’s much easier to have fun playing with these settings in the fall aurora season then in the dead of winter!
I have had some exposures as long as 20 seconds and have used ISO as high as 5000. However, I’d recommend staying under 25 seconds as the stars will start to get “tails” or be oval shaped – as they are always moving in the sky, and after 25 seconds your camera capture some of that movement. I know you may be thinking, 5000 ISO but newer cameras and noise removal programs are amazing.
Details: using a shorter exposure results in more detail on the edges of the aurora.
Composition: Here are a few things to think about to take an interesting aurora photo while factoring perspective and scale. Considering you’ll naturally be shooting upward try the following:
- Incorporating a narrow strip of the horizon in your frame can provide an anchor and balance to the image.
- Choose foreground elements, such as trees, an interesting building or people.
- If you are near water, look for reflections as the lights move across the sky.
- Try switching up your compositions and shoot both vertical and horizonal scenes.
- Look to see if you can incorporate constellations or the milky way in your photos.
Keep in mind that there will be other times that you may want shoot directly overhead into the corona or where the lights seem to swirl and start.
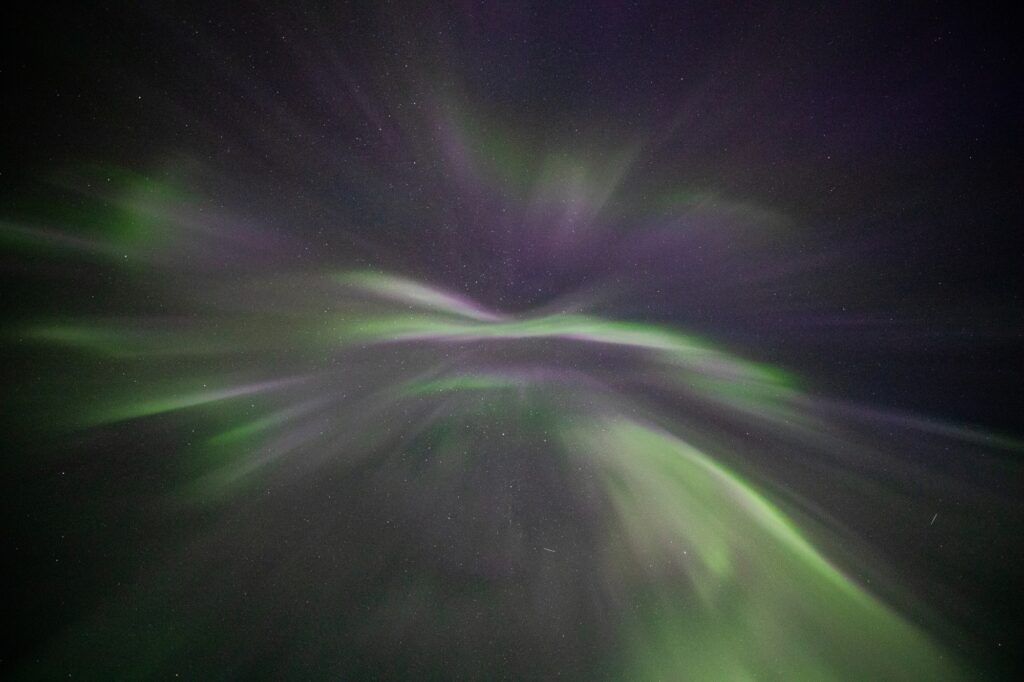
Be sure to look around you as you are shooting, sometimes the aurora will be active behind you! Composition is a personal choice, but take a variety, and see what you like the best. The lights will always be changing so you can shoot several different shots from one location.
Image Review and Histogram – you can refer to your histogram to check exposures, as the image in your camera view finder may look dull, or dark. The histogram should have black- left side info, and light-right side info, if everything is to one side or the other you will need to adjust your exposure.
Everything to the right of centre means you have overexposed, especially at night where you should have some black or dark blue sky in your images.
Everything on the left of centre means your image is dark, which is to be expected at night, but the “lights” should show up around the right of the middle. Use your replay screen, and your histogram together and adjust your exposures as needed.
Processing Images: RAW & JPEG. RAW files have more information than JPEG files, so when processing, adding contrast or lightening shadows you will have more detail to work with if you shoot in RAW. However, if you are used to shooting in JPEG, and are more comfortable processing from this format do what you know best.
When processing your images, you can adjust the Highlights to bring out the lights, add some Dehaze, or Contrast. You can also adjust the color by adding or subtracting temperature, warm or cool.
How you process aurora photos is a personal preference. Some people like bright color and high contrast, while others prefer to keep the final image looking more natural. Regardless, try to remember to be careful with over saturation and over processing. The images you will get from your camera will already be substantially brighter than what you saw with your eyes.
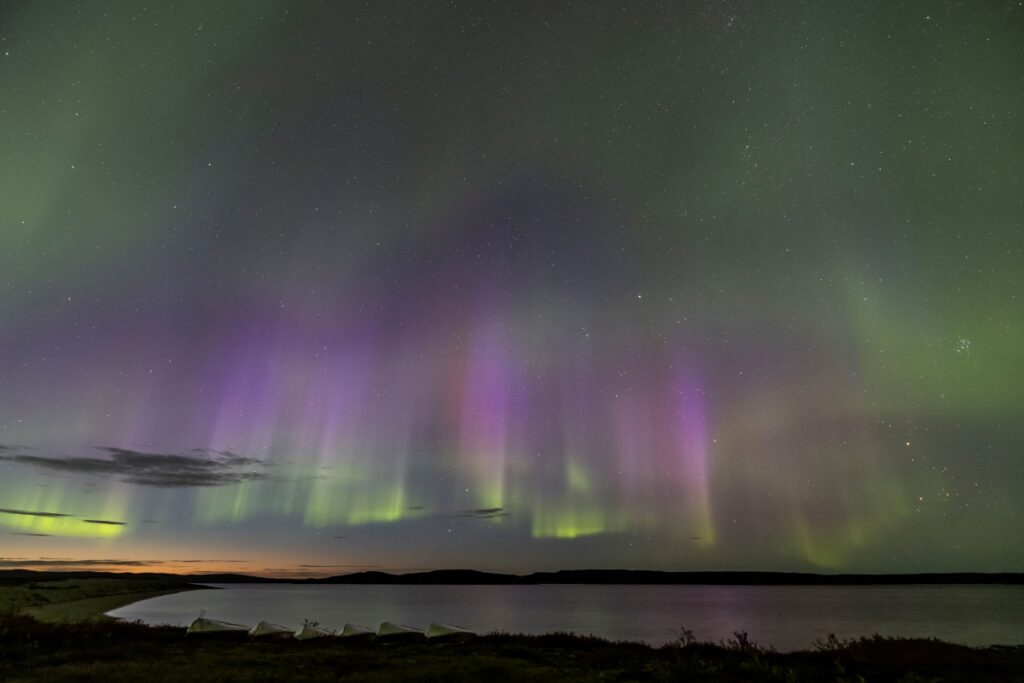
Details: Using higher ISO for more detail and enough time to capture the colors.
Other Helpful Tips:
- Dress warm, and wear comfortable waterproof shoes, you will be standing around and may be in wet grass, or sand.
- Bring an extra battery just in case, as you will use lots of battery power reviewing your shots and checking focus.
- Wear a head lamp (with red light option) or carry a small flashlight. You will need it to walk around, as well as to check camera settings, or find the lens cap you drop.
- Give yourself time to let you night vision kick in when you go from a lit location into dark. It takes 5 or 10 minutes for your eyes to adjust; try not to use your flashlight unless you have to.
- Practice setting up your tripod, and attaching your camera in a dark room, or blindfolded so you are comfortable at night and won’t need to rely on your flashlight.
- Some protective filters cause light distortion at night, so you may want to remove them.
- If it’s a night with heavy dew, check your lens often to see if there’s any condensation, and if so, carefully wipe it with a lens cloth. Remember to check your focus afterward as you may have shifted the lens.
Respect property, nature and other photographers: If you are in an area where there are other photographers: don’t set up too close to them. Always make sure to stay out of other people’s shots, (wide angles lenses are very wide) and avoid using your headlamp or flashlight on without asking first, encase other photographers are in mid shot. Be mindful that the LED screen on the back of your camera can be very bright and distracting so try to use the viewfinder to compose your shots, and only use the LED to review or check focus. If you are on private property respect the landowner, and always ask for permission first. If you are out in nature, be aware of your surroundings and stay safe.
Information for Smartphone photographers: Check your phone to see if it has a night mode, and for how long you can get the exposure. Many phones take a series of images and blends them together to create one, some have the ability to allow your manual settings. You can also download an app that allows you to set exposure similar to what’s listed above. You will still need a tripod, and if the aurora is bright enough you can even shoot video. Consider practicing with your phone at night and get to know how it works. Although phone images will not match the clarity or detail of those taken with a camera, they can be sufficient for posting on social media, showing to friends and family, and look back on your nights of wonder under the northern lights.
Capturing the Northern Lights requires a combination of technical knowledge, patience, and the right conditions, it is also a mix of art and science. Peterson’s Point Lake Lodge provides a perfect location for viewing nature’s light show, with its remote location and breathtaking scenery. With the added benefit of a photo led to guide you and daily guided excursions to enhance your adventure, you’ll have all the tools and support needed to create stunning images that truly capture the magic of this natural phenomenon. Whether you’re a seasoned photographer or just starting, the key is to experiment with different settings and techniques until you find what works best for you. And remember, the experience of witnessing the aurora is just as important as capturing it—so take a moment to put down the camera and simply enjoy the spectacle above.
By Cheryl Stewart
